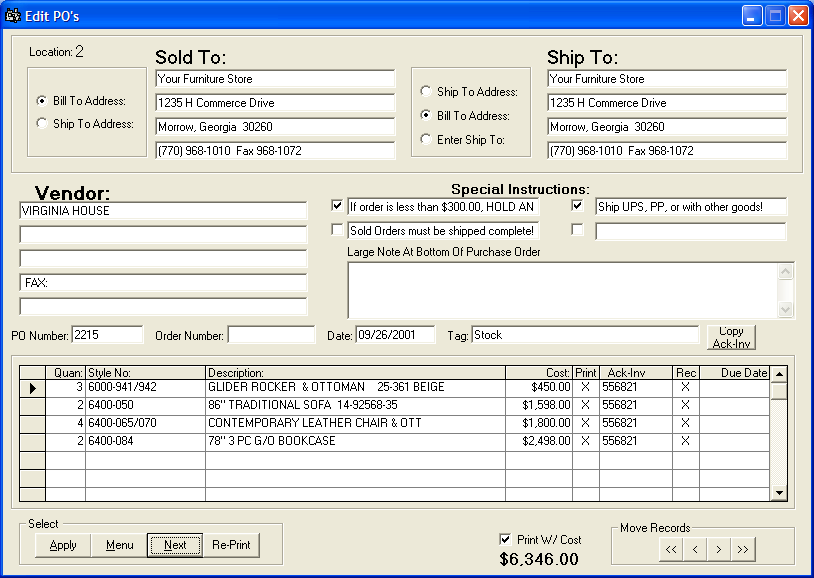
To edit or view POs, click Inventory: Purchase Orders: Edit/View POs. The "Edit POs" form will appear. In this form, you can change the Sold To, Ship To addresses. Enter a third party "Ship To" other than shipping the merchandise to the store or warhouse. Special Instructions fields may be completely switched on or off in the Store Set Up; Options page. You can manually add a note to the factory in the Large Note Box. This note will be printed below the last items on the P/O's in large bold type.
For each line item, you can adjust the factory cost on the Cost Column; add the factory acknowledgement number or Invoice number in the Ack/Inv Column; Enter then expected factory ship date under Due Date Column. Adding the Invoice number or acknowledgement number is extremely important for each line item. This number is used for tracking throughout the software. If you have the "Post PO's to A/P " option set in the store set up, then this number gets automatically entered into A/P along with the cost of the shipment. On a stock order only, you can change the quantity and it will automatically go back into View Stock Items and change the On Order by store column.
Note: Always click the Apply button to save any changes made. If you click the Next or Menu button, those changes will be lost.
When the Edit/View POs form appears, it will show the earliest Purchase Order that has not yet been printed. Use the scroll bar at the bottom to scroll between records. To reprint a PO, click the Re-Print button, enter the beginning and ending PO numbers, and click Print.
Note: To reprint only one PO, enter the same number in the beginning and ending boxes.
After making changes and saving a PO, click the Next button to proceed to the next PO. A "Next POs" form will appear. Enter the PO number, and click Apply. If you're not sure of the PO Number, click Look Up. A list of POs will appear. Find the PO in the list, and double-click on it. You can also use the PO Number or the Bill Of Sale number for accessing the PO.